When reading how-to manuals on cannabis growth, you’ll frequently find that a certain level of horticultural expertise is required. However, not all of us were raised in gardens. As we approach the legalization of cannabis in Canada, we figured it was an excellent time to put out a really basic tutorial on how to cultivate marijuana. One that doesn’t require you to have any prior knowledge. If you know how a plant grows (insert seed into earth, water it, and a plant appears), you can learn the fundamentals of cannabis cultivation here.
Make Room
Cannabis plants take up space. This is something we all know to be true. You may produce little plants in tiny pots and large ones in vast containers, but you’ll need at least a few square feet each plant. For your first grow, we suggest starting with one or two plants. You’re likely to make mistakes and try new things as you begin, so don’t risk botching up a significant crop for your first time. Allow 3-4 square feet per plant to give yourself some wiggle room and accommodate the outward expansion of each plant. In addition, there should be adequate growing area above the plant. An unoccupied closet, additional space, or a grow tent are all excellent alternatives.
Outdoor cannabis farming, on the other hand, has many more variables to consider: the weather, changes in seasons, security concerns, and a higher risk of pest infestation. We don’t suggest it for inexperienced growers or for best results.
Get the Gear
Before you begin producing marijuana, you’ll need to acquire some equipment. While you might throw a seed in dirt and water it hoping for a good harvest, that isn’t going to happen if the plant doesn’t survive. It’s well worth spending a little extra on suitable equipment. Not only will this result in greater quality bud, but it will also make the process much easier. Simply follow the instructions to a ‘T,’ and you’ll be harvesting bud in no time!
Just the Essentials
Here’s a list of the absolute bare-bones essentials to get started growing:
- Cannabis seeds or clones. This article is only for individuals with medical training to cultivate cannabis. You cannot legally buy seeds or clones in any other manner.
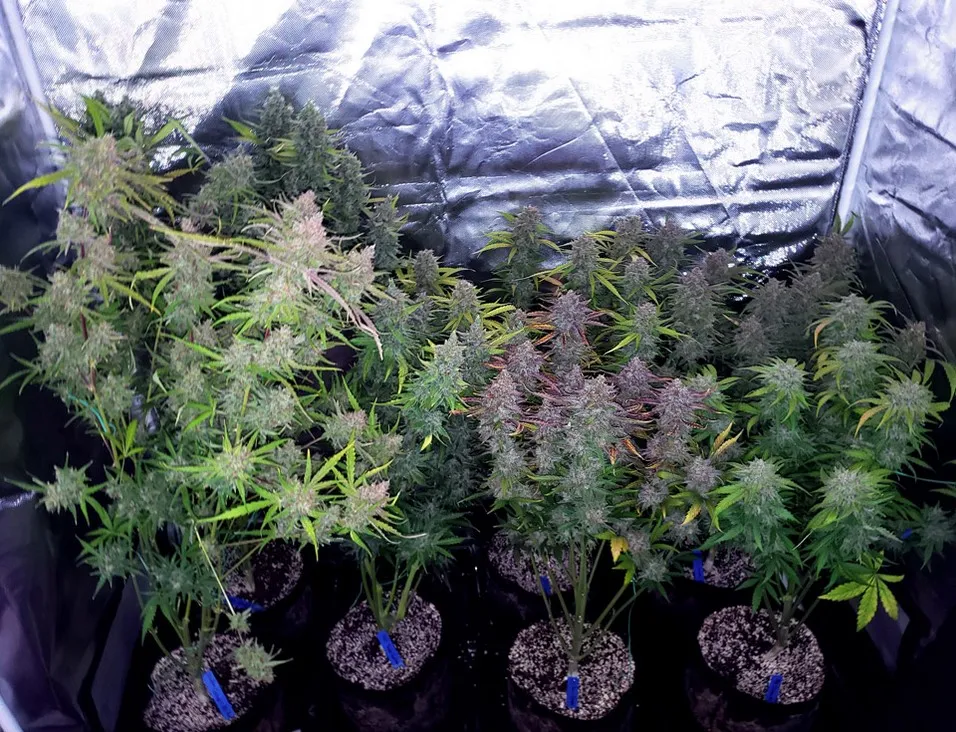
- Grow tent (optional but strongly recommended). Tents are enclosed, box-shaped frames covered in canvas – a tent. The inside is made of reflecting fabric for optimal use of your lighting. They come in a variety of sizes, from 2’x2’x4′ to over twice that size. Unless you’re confident you’ll need more room in the future, a simple 2’x2’x4′ tent should enough for your first grow.
- Soils and fertilizers for each growth stage. We suggest the Craft Cannabis Kit as a one-time purchase for organic growth! There are several factors to consider when selecting a growing medium. There’s also a lot to understand about development stages and the different demands of mature and young cannabis plants. The Craft Cannabis Kit has everything you’ll need to get started, including soil, fertilizers, and growth instructions. If you go with different soils and additives, you’ll have to learn some rather advanced horticultural science. Finally, if you’d like to learn about some plant growth concepts in a simple manner, check out some of our growing guides.
- Potting containers. This requires a 5-gallon bucket, but any similar size container will suffice. Every few inches around the container’s base, make sure you’ve drilled drainage holes.
- Trays to trap drainage from your pots. Otherwise, you’ll get dirty water all over the place. It’s not ideal. You don’t want your plants to sit in standing water for too long. If there’s too much water in the tray, you may need to remove the surplus fluid.
- A light. There are so many different types of light available, from LEDs to CFLs and specialized HID lights. Some of these choices produce a lot of heat or consume a lot of electricity, such as HIDs. Others are quite comfortable and energy-efficient. LEDs are an excellent choice for novices because they are easy to set up and use little power while producing minimal amounts of heat. Suspend them about 18 inches above your plants, adjusting height as needed. The most significant up-front and ongoing expenses for indoor farming are typically light fixtures. Expect to spend at least $75 on a grow light, as well as anywhere from $20 to $75 each month in electricity costs, in addition to what you’re paying now.
Get Growing!
You’ll need to put everything together once you’ve got all your equipment sorted. It’s difficult to give general advice for every grower’s setup due to the variety of setups available. However, there are a few things to bear in mind.
Germination and Watering
The first step is to germinate the seeds. Germination of cannabis seeds is simple. You simply need to warm and moisten the seeds. You can get seeds started by burying them a half inch to an inch into your cropping container’s soil and watering them in. However, water management may be challenging in a big container. Placing plants in a little container, such as one made out of paper or plastic, might assist you avoid flooding your plant by preventing overfilling or drowning it.
When the top half inch to inch of soil feels dry, you should water. Water until the earth is fully saturated and a fifth of your water has filtered through the soil and into the drainage tray. This will help wash out salt accumulation that may cause nutritional shortages over time.
Some people plant their seeds in seedling plugs instead. The plug will then be transplanted into the main growing container once the seedling is strong enough. Cannabis seeds germinate best when planted in aseedling plug. They’re widely available at hardware stores and garden centers.
Pruning

You can learn a lot more about pruning cannabis than what is covered in this article. Don’t expect your first few harvests to have perfect pruning tasks. It’s a talent that needs to be honed over time.
Feeding and Light Schedules
If you transplanted your plant’s clone after the germination stage, you’ll need to establish a watering, feeding, and light routine for it. After they’ve sprouted (or after you’ve transplanted your clone), your plants should be exposed to light for 18-20 hours each day rather than triggering the flowering stage when they will begin producing buds.
It’s time to go into bloom when your plants are large enough. This is achieved by altering the light cycle to 12 hours of light and 12 hours dark. If you utilize our products, you may use our flowering period timetable builder to establish feeding, watering, and lighting needs throughout the blooming stage. Otherwise, you’ll need to conduct some research into the nutrients and additives you’ve chosen to utilize. You must give your plants with adequate nutrition in order for them to produce enormous buds.
Harvesting and Curing
You’re ready to harvest when the blooming process is over. There are several ways to pick flowers. The simplest option is to just cut off each branch with the bud on it and hang them from the ceiling in a dark, cool room with a fan on low speed to distribute air. Trimming buds when they’re dry and the branches are fragile is the most effective method of preserving space while still getting as much yield as possible. Place the buds in sealed containers to cure, allowing moisture to escape a few times a day for several days. To let the bud cure fully, keep them this way for weeks. This ensures that your cannabis is good-tasting, high-THC.
That’s It!
That’s about all there is to it for basic cannabis cultivation. It only takes a few minutes to grasp the fundamentals, but years of study and practice are required to master it completely. You’ll learn from your mistakes and strive to improve with each successful growth. We’ve put up some growing tutorials to assist you understand some of the more complex growing ideas. Keep at it, and you’ll be an expert in no time!


