Why Learning to Roll Is Worth It
Rolling your own joints is one of those small cannabis skills that pays off forever. Pre rolls are handy, but learning to roll means you control the size, the strain, and how tightly it is packed, and you save money over buying them ready made. It is also just a satisfying thing to be good at, the kind of skill that comes in useful at every hang out.
The good news is that rolling is not hard. It looks tricky the first few times, and your early joints might come out a little lumpy, but the basic technique is simple and the only real teacher is practice. Within a handful of attempts most people can produce a joint that burns evenly and smokes well, and from there it only gets better.
This guide breaks the whole process down step by step, from picking papers to fixing common problems. Whether you have never rolled before or you just want to tidy up your technique, the aim is to get you rolling smooth, even joints that burn the way they should. Take it slow at first, and do not worry if the first one or two are rough.
There is also something to be said for the ritual of it. Plenty of smokers find the act of grinding, rolling, and sealing a joint relaxing in its own right, a little wind down before the actual session even begins. Once it becomes second nature, rolling stops being a chore and turns into part of the enjoyment, which is reason enough to put in the early practice.
What You Will Need
The list of gear is short. You need rolling papers, your cannabis, a grinder, and something to make a filter tip, often called a crutch or roach. Many paper packs include tips, or you can use a small piece of thin cardboard. That is genuinely all the essential kit, which is part of why rolling is such an accessible skill to pick up.
A few optional extras make life easier. A small rolling tray keeps your flower from scattering and catches the bits that fall, a packing tool or the back of a pen helps you firm up the joint, and a lighter goes without saying. None of these are required, but a tray in particular makes the whole process tidier and less wasteful, especially while you are learning.
Quality matters a little here. Fresh, sticky flower rolls far more easily than old, dry weed that crumbles to dust, and a decent grinder gives you the even consistency that makes rolling simple. You do not need anything fancy, but starting with good ingredients removes a lot of the frustration that puts beginners off.
It is also worth keeping your supplies together in one spot, whether that is a tin, a pouch, or a drawer. Having papers, tips, a grinder, and a lighter in one place means you are never hunting for a missing piece mid roll, and it keeps everything clean and in good shape. A little organisation makes the whole process quicker and far less frustrating, and it means you can roll up on a moment's notice whenever you feel like it.
Choosing the Right Rolling Papers
Rolling papers come in a few materials, mainly wood pulp, rice, and hemp, and each behaves a little differently. Wood pulp papers are the most forgiving and easiest for beginners, since they are slightly thicker and grip well. Rice papers are thin and burn slow and clean but can be a bit fiddly to handle. Hemp papers sit in between, with a nice grip and a slow, even burn.
Size matters too. The common sizes are single wide, one and a quarter, and king size. One and a quarter is a great all rounder and a good place for beginners to start, giving you enough room to work without making a huge joint. King size is for larger sessions or sharing, while single wide is small and personal but a little tighter to roll.
If you are just starting out, reach for a slightly thicker, standard size paper in wood pulp or hemp. The extra grip and forgiveness make tucking and rolling much easier while you learn the motion. Once you have the technique down, you can experiment with thinner rice papers for a cleaner burn and less paper taste.
One more thing worth knowing is that papers vary in how much they affect the taste. Thinner papers add almost no flavour, letting the strain come through cleanly, while thicker ones can add a faint papery note. If you are a flavour chaser smoking something with great terps, leaning toward a thinner hemp or rice paper once you are comfortable rolling will keep the taste pure.
Grinding Your Cannabis
Grinding is the step that makes or breaks a joint, so do not skip it or rush it. A good grinder breaks your flower into an even, fluffy consistency that packs uniformly and burns smoothly. Uneven chunks lead to airflow problems, canoeing, and an inconsistent smoke, so taking a moment to grind properly saves you a lot of grief later.
Aim for a texture that is broken down but not powder fine. You want it loose and even, roughly the consistency of coarse ground herbs, so the joint can still draw air through it. If you grind it to dust, the joint packs too tight and becomes hard to pull, so stop while there is still a little texture to the material.
If you do not have a grinder, you can break the flower up by hand or use scissors in a small glass, just take your time to get it as even as you can. A grinder is far easier and gives a better result, but the key principle is the same either way, an even, fluffy grind with no big stems or hard chunks left in.
It also helps to keep your grinder clean. Over time, resin builds up on the teeth and screen, which makes grinding less effective and can leave your flower clumpy. A quick clean every so often keeps it working smoothly and gives you that even, fluffy grind every time, which feeds directly into easier rolling and a better burning joint.
Making a Filter Tip
A filter tip, also called a crutch or roach, is the small rolled piece of card at the mouth end of the joint. It does a few important jobs. It stops bits of flower from getting in your mouth, it keeps the end open so the joint draws well, and it gives the whole thing structure so it does not collapse or get soggy as you smoke.
Making one is easy. Take a thin strip of card, many papers come with tip card included, and start with a few small accordion folds at one end to create a little filter, then roll the rest around it into a cylinder roughly the thickness you want your joint. Those folds are what stop flower from being pulled through when you inhale.
Match the tip size to your joint. A slightly thicker tip makes for an easier draw and a more comfortable mouthpiece, while a thinner one keeps a smaller joint neat. Once you have rolled a few, you will settle on a size that feels right for you. It is a small step, but a good tip genuinely improves how a joint smokes.
Loading the Paper
Hold the paper with the glue strip up and facing toward you, then place your filter tip at one end, usually the left if you are right handed. Sprinkle your ground flower in an even line along the crease of the paper, working from the tip outward. Keeping the amount consistent along the length is the secret to a joint that burns evenly.
Do not overload it. A common beginner mistake is cramming in too much flower, which makes the joint impossible to roll neatly and harder to pack and seal. Start with a modest amount spread in an even line, since you can always make the next one bigger once you have the technique down. An even, moderate fill is far easier to roll well.
Give the loaded paper a gentle shake or a light press to settle the flower into the crease before you start rolling. You want it distributed evenly with no big lumps at one end and gaps at the other. A little patience at this stage makes the actual rolling much smoother and helps the finished joint draw and burn the way it should.
The Roll and the Tuck
This is the part that takes practice, so go slow. Pick up the loaded paper between the thumbs and forefingers of both hands and gently roll it back and forth to shape the flower into an even cylinder. This little rocking motion settles everything into a tube shape and is the foundation of a good roll, so take your time and do not squeeze too hard.
Once it feels evenly shaped, it is time to tuck. Tuck the edge of the paper closest to you down and around the flower, using the filter tip as a guide to keep the end neat. The tuck is the trickiest move for beginners, so be patient. You are trying to wrap the bottom edge snugly around the flower before you roll it up the rest of the way.
With the tuck started, roll the joint upward toward the glue strip, keeping it even and firm but not crushing it. When you reach the glue, lick the strip lightly, just a little moisture is enough, and press it down to seal along the length. Run a finger along the seam to make sure it is stuck, and your joint is basically formed.
If your first attempt comes out lumpy or loose, do not unroll it in frustration and give up. You can often smoke a rough joint perfectly well, and even a messy one teaches your hands the motion. The tuck especially is something that only clicks through repetition, so treat every roll as practice and expect steady improvement rather than instant perfection.
Packing and Sealing the End
With the joint rolled and sealed, the open end will usually have a little loose flower and some empty space. Gently pack it down using a packing tool, the back of a pen, or a chopstick to firm everything up. This removes air gaps and helps the joint burn evenly instead of running fast or going out, so it is a step worth doing properly.
Pack it firm but not rock hard. If you pack too tightly, the joint becomes hard to pull and may not burn well, while too loose and it burns too fast and unevenly. You are aiming for a gentle, even firmness all the way down. A few light taps and a careful press are usually all it takes to get there.
Once it is packed, you can twist the excess paper at the open end to close it off. That twist seals in the flower, makes the joint easy to carry, and gives you a handy spot to light. At this point you have a finished, properly rolled joint ready to smoke or save for later.
Lighting It the Right Way
How you light a joint affects how it smokes. Hold the flame to the twisted end and rotate the joint slowly while drawing gently, so the whole tip lights evenly all the way around. Lighting just one side is what causes canoeing, where the joint burns unevenly down one edge and wastes flower, so an even light at the start prevents a lot of problems.
Take it easy on the first few pulls. Slow, gentle draws help establish an even cherry and keep the joint burning steadily, while hard, fast pulls can make it burn too hot and unevenly. Once the joint is going nicely and the burn line is even across the tip, you can settle into a normal pace and enjoy it.
If your joint goes out partway through, which happens to everyone, just relight it the same way, rotating the tip for an even burn. There is no need to relight aggressively. A gentle touch up to the cherry and a slow pull will usually get it going again without scorching the flower or making it harsh, so you lose nothing by taking your time.
Common Mistakes and How to Fix Them
The most common beginner problems are rolling too loose, rolling too tight, and uneven burning. A loose joint burns fast and feels airy, while a tight one is hard to pull. Both come down to packing and consistency, so adjust how firmly you pack and how evenly you spread the flower next time, and you will quickly find the sweet spot.
Canoeing, where one side burns faster than the other, is usually caused by an uneven light or an uneven pack. Fix it by lighting the tip evenly all the way around and by spreading your flower consistently before rolling. If a joint starts to canoe mid smoke, you can sometimes correct it by lightly wetting a finger and dabbing the faster burning side to slow it down.
Runs, where the paper burns down one side in a line, often come from a flaw in the seal or paper. Wetting the running edge slightly with a finger can slow or stop it. And if your joints keep falling apart, it usually means the grind was uneven or the seal was not pressed down firmly, both easy things to improve with a little practice.
Tips for Beginners
Start with bigger papers and a generous, even fill while you learn, since smaller, tighter joints are harder to handle when your fingers are still getting used to the motion. There is no shame in rolling a slightly chunky joint at first. The goal early on is simply to get the tuck and roll down, and you can refine the size and neatness later.
Practice with cheap herb or even an empty paper before committing your best flower. Rolling the motion a few times without wasting good weed builds muscle memory fast, and you will feel much more confident when you do reach for the real thing. Plenty of people practise with a pinch of any dry herb just to drill the tuck.
Most of all, be patient with yourself. Everyone's first joints are rough, and that is completely normal. Each one teaches you something about packing, tucking, and sealing, and within a week of casual practice you will be rolling joints you are genuinely happy with. It is a skill that rewards repetition more than talent.
It can also help to watch someone who rolls well, whether in person or in a quick video, and then copy the hand movements slowly. Seeing the tuck and roll done smoothly makes the written steps click into place, and mimicking the motion is often faster than figuring it out from scratch. Pair that with a bit of hands on practice and you will get there quickly.
Alternatives If Rolling Is Not for You
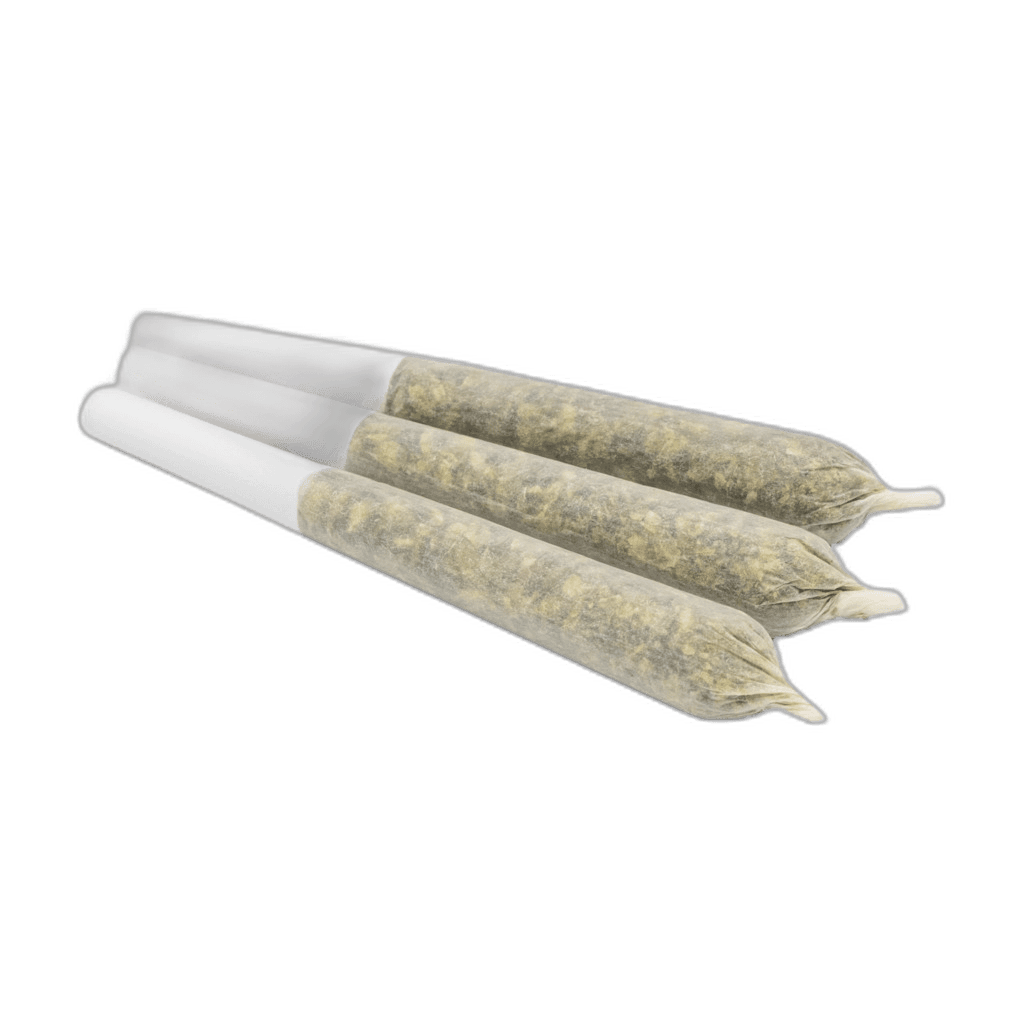
Not everyone enjoys rolling, and that is perfectly fine. Pre rolled joints are widely available and save you the effort entirely, letting you enjoy a joint without any of the fuss. They are great for convenience, for sharing, or simply for the days you do not feel like rolling, and quality has come a long way.
If you would rather skip papers altogether, pipes and bongs are simple, reusable options that just need you to pack a bowl and light it. Vaporisers are another route, offering a cleaner, smoother experience and great flavour without combustion. There are plenty of ways to enjoy flower, and rolling is only one of them.
For anyone who wants the joint experience without the rolling, rolling machines and pre made cones are a nice middle ground. A cone lets you simply fill and pack a ready made paper shape, which takes most of the difficulty out of the process. There is no wrong way to enjoy your cannabis, so pick whatever fits how you like to smoke.
Get Quality Flower Delivered
A good joint starts with good flower, and that is where GasDank comes in. Fresh, sticky, properly cured bud rolls far more easily and smokes far better than dry, crumbly weed, so starting with quality makes everything in this guide simpler. We keep a wide range of strains so you can pick whatever suits your session.
Ordering is easy. Browse the menu, add your flower and any accessories like papers or pre rolls, and check out. GasDank delivers same day across Toronto and the GTA, with a $40 minimum, free delivery on orders over $80, and payment by cash or Interac e-Transfer. You will need to be 19 or older to order, the legal age for cannabis in Ontario.
Whether you are practising your rolling or grabbing some pre rolls for convenience, we have you covered. Check the live menu for fresh flower and accessories, and get everything you need for a smooth session delivered straight to your door, often the very same day you order.


